Showing posts with label recipes. Show all posts

Wednesday, January 11, 2012

New Year, new cookbooks, new recipes

Well we are almost two weeks into the new year and we are cranking right along here on the ranch. I love this time of year partially because everything is covered in snow and it feels like winter. This year no such luck. We have gotten 3 good snow storms for a total of about a foot of snow and it is all gone already. We have been in the 50's for highs and that is very unusual. The cows are enjoying it but if the weather doesn't chance soon they won't be enjoying the weather come spring and summer.

My big excitement is my new cookbooks I ordered after Christmas. I love new cookbooks, nothing better than looking through them and finding new recipes to make and discovering new favorites. So what cookbooks did I order? Here they are and they are great cookbooks with wonderful recipes, photography and great stories to go with the food.

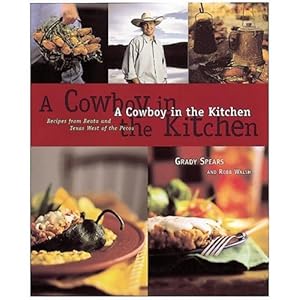
This is so far my favorite of the new cookbooks. There are a ton of great recipes that any cowboy would love or kids and non-cowboys for that matter!


This cookbook is the product of two mom's trying to find and fix food for busy families. The ingredients are basic but the flavor in the cooking is anything but.
Again a great cowboy cookbook. Trying to find new and creative ways to fix a freezer full of beef requires a variety of cookbooks and this one looks to provide new and tasty beef recipes.
I love old recipes but sometimes the ingredients are hard to find in today's grocery stores. This cookbook takes the recipes that the pioneer's brought with them and updates them for today. I have to admit I bought this one solely based on the fact that it had a recipe for salt water taffy. I am happy to say that there are numerous recipes marked ready to be made in the next few weeks other than taffy.

My next cookbook purchase will come in March and I can't wait for it, but I guess I will have to since it doesn't come out until then!
So until then I will be busy cooking up a storm with my new recipes in hand. I will be sure to share some of the recipes, but these cookbooks are well worth having in your own kitchen.

Monday, December 12, 2011

Hot Spiced Apple Cider

Well I mentioned my spiced apple cider the other day on my Facebook page and I have had requests for the recipe so I'm sharing it here with everyone. It is a supper easy recipe to make and it will have your whole house smelling wonderful for hours.
I make mine in the Crock-pot but you can just as easily fix it in a pot on the stove top. I also make a ton of it because before you know it, all the cider is gone!

64 oz bottle of apple cider
1 large orange sliced
2 cinnamon sticks
1 teaspoon whole allspice
1/2 tablespoon whole cloves

Put all the ingredients in your Crock-pot or pan, heat to boiling and then turn down the heat to warm on a Crock-pot or simmer on the stove. Enjoy the taste of the cider and the smell in your house.


Enjoy this with your family this holiday season. May the blessings of the season be with you and yours and continue into the next year. Stop by Fresh From the Farm linky party for more great recipes.

Wednesday, November 9, 2011

Love this time of year, oh and ribs too!

It is surely feeling like fall here. Not only in the sense that it is hunting season but the fact that the fireplace is going everyday, I'm wanting to bake everyday, soup is back on the dinner menus and it is by oldest birthday. The hubby is strange in the fact that he only wants or will eat soup and stew during the fall and winter. Me I could eat a big bowl of chili any night of the week!
So just what has been cooking in the kitchen? Today is brownies and Crock-pot pork ribs. It is my oldest daughter's 14th birthday today. She requested her favorite of BBQ pork ribs cooked in the Crock-pot and I was all ready to share with you photos of all the steps, but the camera went with the hunters today and has not returned. I'm hoping that means that they have a buck down and will be coming home with pictures and meat!
So I will give you the recipe and you will just have to use your imagination for the picture part.

Easy Crock-pot BBQ Pork Ribs

1 rack of ribs (around 5 lbs)
salt and pepper to taste
2 tablespoons liquid smoke
BBQ sauce

To keep the ribs from making a mess in the crock pot, line it with aluminum foil. Put in two pieces of aluminum foil cross wise and this will keep everything from sticking in the pot and make clean up a breeze.
After that split the rack of ribs in half, salt and pepper to taste, put in the crock pot pour in the liquid smoke and a small amount of BBQ sauce and cook on high heat for 3 hours. After 3 hours turn to low heat and continue to cook until the meat is just ready to fall off the bones.
Now you can finish the ribs in different ways. If the weather is warm and nice I fire up the propane grill and baste them with the BBQ sauce that way. However if the weather is like it is today I put the ribs on a cookie sheet spread the BBQ sauce all over them and put them in under the broiler for no more than 15 min or until the BBQ sauce is cooked on the ribs.
Serve this with your favorite rib side dishes and don't worry about the clean up, because you lined the pot with aluminum foil.
Stop by the linky party with Fresh from the Farm recipe swap for even more great recipes.

Monday, October 24, 2011

Hunk of Meat Monday


 Here is my quest post for fellow blogger Pinke Post and her Hunk of Meat Monday series. Stop by her blog and check out life on the prairies of North Dakota.
Hunting season has hit our house in a big way this year. First it starts with me and dove season and then quickly moves on to archery season and now we are looking to the rifle deer season. This year is extra special as our oldest has her first deer hunting coming up in the next few weeks. Hoping to have plenty of pictures to post a great story to go with them in a few weeks!


 We have been scouting for a good buck for her and she has a few picked out that she wants to go after. So in honor of her upcoming hunt I’m sharing my recipe for Venison Stew which I am hoping to be able to make often this winter. I love nothing better than being able to open my freezer and pull out a package of venison to cook up, done right venison is tender, flavorful and can be used in a wide variety of recipes. Pretty much if a recipe calls for beef you can replace it with equal amounts of venison. The only thing to remember is that venison has very little fat so if you use it in a ground form it will not shrink down like ground beef.
Venison Stew
2 lb venison roast or tenderloin rinsed, drained and trimmed and cut into bite sized pieces
1 cup carrots chopped
½ cup celery chopped
½ cup onion chopped
2 cloves garlic minced
1 14 oz can diced tomatoes
1 8 oz can tomato sauce
2 potatoes chopped
½ cup red cooking wine
2-3 tbsp Worcestershire  sauce
1 tsp of each of the following spices: Thyme, Sage, Parsley, Oregano, Basil
2 bay leaves
Salt and Pepper to taste

1) In a cast iron dutch oven brown the venison. Add the carrots, celery, onion and garlic and cook until soft.
2) Add the potatoes, tomatoes, tomato sauce, wine, Worcestershire sauce, spices and enough water to create the broth.
(Insert “stew picture” here)
Stir and bring to a boil then reduce heat and cook until the meat and potatoes are tender. You may need to add water as the stew cooks, do not let the broth get too low.


Serve with a salad and a good loaf of bread to use to pick up all the broth in the bottom of the bowl.
Here is hoping that your hunting season is successful. Get out there and take your kids with you, even the girls!

Wednesday, October 5, 2011

Pumpkin Spice Bars

Well it is feeling like fall here finally. The days have turned cool and damp and there is even a chance of snow on Friday. Not sure that I am ready for that yet, but we will see what comes of it.
With this cooler weather comes my increased need to bake and cook. My favorite things to bake this time of year is anything that contains pumpkin in the recipe: breads, muffins, cookies, pies, soups, you name it. Today was Pumpkin Spice Bars. These are yummy little gems of goodness. By the time they are done cooking your house will smell wonderful and they taste even better. Taking a bite of them is like getting a bit of only the filling in a pumpkin pie, which in my opinion is the best part!
Now this original recipe was not of my creation, but I have changed it over time and think that it is even better than the original. Not to mention, healthier than the original.

Pumpkin Spice Bars

1 1/2 cups all-purpose flour
1/2 cup whole wheat flour
2 teaspoons baking powder
2 teaspoons pumpkin pie spice
1 teaspoon baking soda
1 1/3 cups sugar
1 15 oz can pure pumpkin
4 eggs
1 cup apple butter (this is a replacement for oil, if you don't have apple butter you can trade out for oil but will not be as moist)
1/2 cup chopped walnuts

1) Preheat oven to 350. Mix together flour, baking powder, spice and baking soda. With a mixer beat sugar, pumpkin, eggs and apple butter until smooth. Gradually mix in flour mixture until well combined. Stir in walnuts.

2) Grease a jelly roll pan or 15x10x1 baking pan. Spread the batter in the pan and bake at 350 for 20-25 minutes or until a toothpick inserted in the center comes out clean.

3) Cool in the pan and once cool you can top with a thinned cream cheese frosting. To thin the cream cheese frosting, if store bought warm in the microwave. If you are making the frosting, thin a small amount with the addition of milk until it is pourable.

The hardest part of this recipe is waiting for the bars to cool off before frosting and diving right in!

Tuesday, September 13, 2011

Pound Cake with Lemon Pudding and Raspberry Topping

Okay so as promised last week I am finally getting around to posting the recipe for the Pound Cake with Lemon Pudding and Raspberry Topping. This is one of those recipes that came about because I had a pound cake to eat and wanted to "fix" it up somehow. The end result was a yummy and tasty dessert that took almost no time at all to complete. The best part of this is you can use any yellow pound cake recipe or store bought that you like. My recipe calls for lemon juice in the recipe so that is where the idea for lemon pudding came from and I just love the flavor of lemon and raspberries, so there you have it.

So on to the recipe.

Lemon Pudding

1 small box of lemon flavored pudding
1 3/4 cup milk

Mix together until the pudding starts to set and then cover and refrigerate until you are ready to serve.


Raspberry Topping

1 package frozen raspberries (12 oz)
Sugar to sweeten to your taste.

Put the frozen raspberries, 1/4 cup water and sugar in a small sauce pan and heat until bubbly and the raspberries breakdown and a sauce forms. Add sugar as needed to get the sweetness that you like. Let this cool down until it is just warm.

To serve the dessert, slice the cake and top with the lemon pudding and then spoon on some of the warm raspberry topping and enjoy!

Friday, August 26, 2011

Pioneer Woman Pineapple Upside Down Cake

One of my favorite places to get ideas and recipes to cook is out of my Pioneer Woman cookbook. If you have never had the chance to try one of her recipes, do yourself a favor and take a side trip to her web site http://thepioneerwoman.com/ and see what you like (there is plenty!) A fellow blogger, Pinke Post is putting together a linky party in which you post your favorite Pioneer Woman recipe and the link back to her site in celebration of Pioneer Woman's new cooking show premiering tomorrow on the Food Network. It just so happens that last night I made Pineapple Upside Down Cake using her recipe, and watched everyone fight over getting a piece, so I'm posting the recipe for everyone to enjoy!


Ingredients

2 1/ cups flour
3 tsp baking powder
1 tsp salt
2 cups sugar
1 stick butter
1/4 cup shortening
1 1/2 cups milk
2 large eggs
2 tsp vanilla
1- 20oz can sliced pineapple, 2 tablespoons juice kept back
1 1/3 cups brown sugar
Maraschino cherries


1) Preheat the oven to 350

2) Make the cake batter in a mixer. Mix the flour, baking powder, salt, sugar, 1/2 stick of the butter, shortening, milk, eggs, vanilla and the 2 tablespoons pineapple juice.

3) Mix until well combined.

4) Melt the other 1/2 of the stick of butter in a 12 inch cast iron skillet over medium heat. Make sure that the butter is melted and covers all of the pan. Sprinkle the brown sugar over the melted butter evenly and let the butter soak into the sugar and start to bubble.

5) Turn off the heat at this point and remove the pan from the heat. Put the pineapple slices on top of the brown sugar and the cherries in the center of the pineapple.

6) Slowly pour the cake batter over the pineapples so you don't move the cherries around.

7) Bake for 30-40 minutes until a toothpick comes out clean of the center of the cake.

8) When done take a knife around the edge of the pan and place a metal cake plate upside down on the skillet and turn everything upside down. Remember to use hot pads!

If any of the cake sticks just use the knife to take it out of the pan and put back with the rest of the cake, this has happened to me, but everyone is so busy trying to get a piece they never notice.

I would have added pictures of the final product, but it is all gone! So you will just have to trust me that this is a yummy dessert!

Tuesday, May 3, 2011

My Inspirations

I was asked by a friend not long ago I have so many ideas for cooking and come up with my own recipes, do I ever get stuck on what to fix for dinner or run out of ideas. And if I do where do I go for inspiration.
Well I have to say that not every night do I fix a meal that I have come up with on my own, good grief that would take a lot of time and work. Most of my inspiration come from knowing what my family likes to eat and what they don't and then just trying different things in combination with each other until I hit on something really good.

One those night however that I am running dry on ideas there are a few places that I turn to for new ideas and inspiration.

My first one to share is Martha Stewart. I know most either love her or hate her. But I owe her the ability to make a flaky pie crust that is easy and delicious. My favorite part of the Martha Stewart world is Everyday Food Recipes. It is just as it sounds, everyday meals that can be cooked with minimum amount of fuss and with common everyday items that even I'm able to find in the aisles of Wal-Mart.
Great part of the web-site is the pictures
  The great feature of this is the Grocery Bag sections, a weeks worth of meals planned out and a shopping list prepared so that all you have to do is print and shop. Oh, and cook!

Now another place that I turn to when I'm not sure what to cook is the Betty Crocker web site. I love this one because you can enter what you have in your refrigerator or pantry and they will come up recipes for you! Also nice about this site is that it features recipes made from or with Betty Crocker products, such as Bisquick, Hamburger Helper, and cake mixes. If you are like me I almost always have some of these products in my pantry and they help make weeknight dinners quick and easy.

Now when I'm looking for something more special and that sometimes takes more time I turn to my cookbook by chef Curtis Stone. It is on sale right now on Amazon, for those interested. I first came across his cooking when he had a show on Discovery Channel called Take Home Chef. While his recipes are not for everyone I love them as they bring something beside steak and bake potatoes to the table and give the girls a chance to taste different food.

Other places I turn to my collection of cookbooks that I have collected over the years. I comb through the discount racks at the bookstores every time I go always looking for something new or something that looks good. I am also lucky in that I have my grandmothers recipe boxes and the hubby's great-grandmothers recipe boxes which are treasure troves of recipes that have been tried time and time again.

My one piece of advice is just do not be afraid to try something new. If a recipe seems kind of wired but contains individual ingredients that you like, try it. I did that once with a recipe for Veracruz Snapper that seemed a little bit off on the combination of ingredients and it is now one of our family's favorites. Yes, I will share that recipe in my next blog.

Saturday, April 30, 2011

What's for dinner

Yes I live on a cattle ranch, but beef is not what is for dinner in this recipe!

As much as we all love beef in all its forms, I love pork and chicken even more (don't tell my husband!) This set of recipes is for a dinner set around a pork tenderloin. If you do not have a tenderloin don't worry; pork chops, pork shoulder steaks, chicken breasts, thighs or legs will work. Heck I'm sure this would work with lamb also, but seeing as I have never cooked lamb in any form I can not make that comment with any amount of accuracy.

Pork Tenderloin w/ Mustard sauce

1 trimmed pork tenderloin sliced in 1" thick pieces
salt, pepper and garlic
1 cup sliced mushrooms
1/2 cup chopped onion
3 tbsp Dijon mustard
2 tbsp Worcestershire sauce
1 tbsp cooking Sherry
1/4 cup whiskey ( you can use beef broth instead and it is just as good)


Season the meat with salt, pepper and garlic and cook in a cast iron skillet until cooked through.
In a small sauce pan melt butter and cook mushrooms and onion until soft. Combine all other ingredients and heat through and serve over the meat.


I normally serve this with a pasta salad, steamed spinach and sourdough rolls.

The pasta salad is easy to fix and can even be done the day before as I think it gets better after sitting in the fridge for a day.

Pasta Salad

1 box garden rotini (or your favorite)
1 bell pepper chopped
1/2 onion chopped
1/2 cup mushrooms sliced in small pieces
1/4 cup black olives sliced
1 can quarter artichoke hearts, drained and rinsed
shredded parmesan cheese
Basil Balsamic vinaigrette dressing (can also use regular Italian dressing)

Cook the pasta until just done, make sure not to over cook. Drain and run under cold water until cooled.
Add the next 5 ingredients, mix well. Pour on the dressing and toss until everything is coated, using as much dressing as you like for the taste.
Top with cheese just before serving.

Sourdough Rolls

I use a bread machine to make the dough and then shape into rolls and raise and this recipe is written for that. You can use the same recipe just mix by hand and let rise for 1 hour or until doubled in size and then shape into rolls

1 cup sourdough starter
1/2 cup water
3 cups flour
1 tbsp sugar
1/2 tsp salt
1 package active yeast

Mix ingredients in bread machine according to your makes directions and set on the dough setting.
When the dough is done on the dough setting remove from machine and turn out onto a floured surface. Pinch off dough in 2" balls, shape and place on a greased baking sheet. Cover and let raise for 30-45 minutes until doubled in size.
Bake at 375 for 20-25 minutes or until top is golden brown.

Really hope you enjoy these recipes.

Monday, April 4, 2011

One Pan Chocolate Cake

If you are like me there are times that I just crave chocolate cake only to find out that I do not have everything to make a cake, not enough milk or eggs. Well here is a recipe that needs no eggs or milk and can be mixed and baked all in the same pan. I don't remember where I got this recipe from originally as I have it on a well used recipe card now, but I hope you enjoy it as much as we do.

One Pan Cake

2 1/2 cups flour
1 1/2 cups sugar
1/2 cup cocoa powder
2 tsp baking soda
1/2 tsp salt
2/3 cups vegetable oil
2 Tbsp cider vinegar
1 Tbsp vanilla
2 cups cold coffe or water
1/3 cup sugar
1/2 tsp cinnamon

Pre-heat your oven to 350.
Stir together flour, 1 1/2 cups sugar, cocoa, baking soda and salt in a 13x9 baking pan
Make 3 holes in the mixture. Pour oil in one, vinegar in one and vanilla in one.
Pour coffe over the whole and mix with a fork until well blended. Spread back into an even layer.
Combine the 1/3 cup sugar and cinnamon and top the mix with it.
Bake at  350 for 35-40 minutes.
Let cool in pan before serving.

Friday, March 25, 2011

Monterrey Tortilla Casserole

Week nights in most houses are busy times and let's be honest most of us do not have time to cook the kind of meal that we would love to serve to our family. That is why this recipe is great, it can be fixed ahead of time and then frozen for up to a month before cooking it. This can also be split into individual portions to put back for a time when you are gone and the hubby or the kids need a good dinner and no idea what to cook.

1 bag tortilla chips
2 cups cooked chicken shredded
1 cup frozen kernel corn
1 16 oz salsa verde (you can use regular salsa, but the green salsa tastes best I think)
3 tablespoons sour cream
3 tablespoons fresh cilantro (if you don't have it you can skip it and don't worry)
1 tablespoon flour
1 cup shredded Monterrey Jack Cheese (or any mix of cheese) I always end up needing more cheese

The first step is the same no matter if you are fixing individual servings or one big one or plan on freezing it or cooking right away.

1) Combine the chicken, corn and salsa in a bowl. Stir together the sour cream and flour until well combined and then add chopped cilantro. Stir the sour cream mixture into the chicken mixture and stir until combined.

To make the casserole in one large dish, spray a 2.5 qt or larger casserole dish and layer with tortilla chips followed by the chicken mixture and some shredded cheese. Repeat the layers once more. Cover with foil and bake in a 350 degree oven for 20 or until the mixture is bubbly. Take off the foil add another layer of chips and the last of the cheese and bake uncovered until the cheese is melted.

Top with your favorite Mexican style toppings and enjoy.

The only change for individual servings would be to split the ingredients into four 10 to 12 oz oven safe dishes. Layer the dishes the same and cook the same also topping with chips and cheese the last 5 -10 minutes.

To freeze either the large casserole or the individual ones complete the recipe up to the point where you would put it in the oven, then freeze the casserole for up to month.
To cook the frozen casserole bake it covered at 350 degrees (do not preheat the oven as this lets the pan heat up gradually rather than quickly if it is glass) for 25 minutes. Uncover the casserole and cook another 20 minutes until bubbly, then top with the chips and cheese and cook until cheese is melted.

Hope you enjoy and as always change what ever you need to in order for your family to enjoy!

Sunday, March 6, 2011

Porcupine Meatballs

Okay, let me just start out by saying that this recipe is not made with Porcupine. It comes from my littlest ones description of the meatballs and the sauce. She was 3 at the time and it just stuck.


1 lb ground beef
1/2 cup bread crumbs
1 egg
1/4 cup milk
2 envelopes Onion Mushroom Soup mix
1 6oz can of tomato paste
2 cups water
1 tablespoon flour

Egg noodles, mashed potatoes or your choice of pasta

Combine ground beef, bread crumbs, egg and milk. Form into 1 inch balls and place on a cookie sheet and refrigerate for 30 minutes.
In a cast iron skillet or oven safe pan brown the meatballs. Combine soup mix, tomato paste, flour and water. Pour over the meatballs and finish cooking in a 350 oven for 30 minutes.

Serve over your choice of noodles or mashed potatoes.

Friday, February 25, 2011

Casseroles #2 Wild Rice and Venison Casserole

Finding and getting good recipes for game meat can be a challenge, let's face it, it's not as if Martha Stewart or Rachael Ray are using venison and elk on their shows. What I have found in cooking with these meats over the years is that most recipes that call for beef can be substituted with deer and elk with just a few minor changes. If the recipe you are using calls for ground beef just trade straight across the same amount of ground venison or elk and continue on with the recipe. For using elk or venison roasts in a crock pot it will cook best if the roast is not completely thawed all the way through and is marinated for a few hours before put in the crock to cook. Doing these two steps helps to keep the meat tender and moist. If you are wanting venison or elk steaks it is key to marinate them overnight or at the very least that day. As for cooking the steak that is done just like a beef steak, but they taste the best when they are cooked only to a medium doneness at the most as past that it tends to dry out the meat. So there is my advice and knowledge of cooking with venison and elk, now on to the recipe.


I use a cast iron dutch oven in this recipe so that everything is cooked in one pot from stove top to oven. If you do not have cast iron just use a skillet on the stove top and a casserole dish in the oven.

Wild Rice and Venison Casserole

1 lb ground venison or elk
1 1/2 cups cooked wild rice (or long grain and wild rice blend)
1 can cream of mushroom soup
1 can cream of chicken soup
1 cup sliced celery
1 cup sliced mushrooms
1 cup water
1 chopped onion
3 tablespoons soy sauce

1) Brown venison in a dutch oven. Add the remaining ingredients and mix well.
2) Bake covered at 350 degrees for 30 minutes, uncover and cook another 30 minutes.

Serve with your families favorite veggies, some bread and you are ready to go.

Casseroles #1 Tuna Noodle

Okay so I asked readers this week what were some recipes or ideas they would like to see in the next few posts. I got a request from Jency for casseroles and cheese rolls. The cheese rolls I'm working on but here are two casserole recipes. Another reader, Susan, asked for ideas for elk and deer and I have not forgotten you I as one of the casserole recipes is for venison. If anyone else has any questions or requests for recipes let me know in the comments section of the blog or on my Facebook page Tales of a Ranchers Wife.

This first recipe is one that I grew up with my mom cooking and it was always one of my favorites. It has now become one of the favorites at my house, so much so that if I'm feeding our hired help Weston along with the family I have to make a double batch just to feed everyone.


Tuna Noodle Casserole (single batch)

3 cups egg noodles
1 7 oz can of tuna in water drained
3/4 cup chopped celery
1/3 cup chopped onion
1/3 cup chopped bell pepper
1 can condensed cream of celery soup
1/2 cup milk
1/2 cup mayonnaise or Miracle Whip
4 oz shredded cheddar cheese

1) Cook the noodles using the package directions and drain when done.
2)  Combine soup and milk and heat through.
3) While that heats combine the noodles, tuna, mayonnaise, celery, onion, bell peppers.
4) When soup and milk are heated add shredded cheese and stir until melted then pour over the noodle mixture and stir and put in a 2 quart casserole dish and bake uncovered at 425 for 20 minutes.

I top ours with more shredded cheese before putting it in the oven, but that is up to you. You can also add other veggies such as peas or chopped cooked broccoli as this is great way to "sneak" some veggies past the kids. Serve with some bread and you have a meal ready to go. Hope you enjoy.

Friday, February 18, 2011

Help with tough beef and recipe for Spanish Rice Casserole

The other day on a fellow ranch wife's blog there was a discussion of what to do with tough cuts of beef. It got me thinking that she is not the only one out there with that problem. There have been plenty of times that I have planned and cooked a meal only to discover that you needed a chain saw to cut the meat and eat it when it hit the table. So is there a solution that works and does not take all day to the problem of tough meat? Yes, at least for me there is. One is to slow cook the meat; this is a tried and true way to help tenderize meat that is less than cooperative. This can be done in the slow cooker for roasts, london broil and brisket (my favorite way to cook BBQ brisket, but that is another post all together!), but what about recipes that call for meat cooked in a skillet quickly. That is when tough beef can be even more difficult to deal with, unless you take one extra step in the cooking process. Cut the meat as described in the recipe and brown it in the skillet just like normal, but before you add any more ingredients add enough water to cover the beef, bring to a boil and then turn down the heat and simmer for about 20-25 minutes or until the beef is tender. Watch the water level during that time and add more water if needed. When the meat is tender, drain off any excess water and continue on with the recipe as normal. I have used this trick on everything from Chinese stir-fry to Indian curry; beef stew; chunky beef chili; beef stroganoff and a wide variety of beef dishes of which I will share with everyone over the next few blogs. The following recipe is one of those that were a childhood favorite and I have made some changes to over the years. Again just like the other recipes here I hope you enjoy and hope that this tip helps you the next time you are worried about an overly tough piece of beef.


Spanish Rice Casserole


1 lb round, flank or sirloin steak; cut into 1 inches pieces
1/2 onion chopped
4 oz can of chopped green chilies
1/2 bell pepper chopped
2- 8oz cans of tomato sauce
1 1/2 cups instant rice and correct amount of water according to the rice package
salt, pepper and chili powder to taste

1) Brown the meat and if needed to make more tender add enough water to cover and simmer until tender. Drain off the extra water. Add bell peppers and onion and cook until soft.
2) Add the tomato sauce, water, chilies and seasoning. Bring to a boil and add rice stir well and turn off the heat and let sit 5 minutes.
3) You can top this with cheese, sour cream, lettuce and tomatoes or you favorite Mexican food toppings.

Tuesday, February 8, 2011

Something Sweet

Well the snow is back again. Woke up to a few inches already on the ground this morning and more coming down just as fast as it could manage. The sun has been out some this afternoon so some of the snow has started to melt, but there is still plenty on the ground. So with the colder temp outside came the desire for one of my favorite winter dinners: Pinto Beans and Ham hocks. This is a dish that my mom would spend all day cooking in the winter and the house would smell so good by the end that you just could not wait to eat. While my mom would take the long road to the end dish, I'm all about making good food: quick food. So in that case I use canned pinto beans, normally what I have canned in the fall but if not store bought ones work also. I have also traded out the ham hocks for ham steak, so that the whole thing can be cooked in about an hour from start to finish instead of having to start the night before soaking the beans and cooking all the next day.

So once the ham and beans were on and doing their thing I got to thinking what else to fix for dinner: dessert. And for dessert tonight Cream Puffs. I love these little golden gems of goodness and the fact that they take almost no work is even better. They may look all fancy and hard to make but with a few ingredients that most all of us keep on hand you can whip up a great dessert in about 40 minutes (this includes the 30 minutes they cook).

Cream Puffs   makes 12 puffs

1 cup water
1/2 cup butter
1 cup flour
4 eggs
1 box instant vanilla pudding (8 servings size)

1) In a sauce pan add the water and butter and heat until the butter is melted and the water is boiling. As soon as the water is boiling add all the flour and stir until it is mixed well and forms into a ball. Turn off the heat and remove pan and let the dough cool for 10 minutes.

2) Add eggs, 1 at a time making sure to mix in the egg completely before adding the next egg. Don't worry about over mixing this dough as it is important to make sure the eggs are stirred in before adding the next.
Spray a cookie sheet and drop 12 large tablespoons of dough on it and bake at 400 degrees for 30 to 35 minutes until the tops are just golden brown.

3) Once the puffs are cooked, cool them on a wire rack. If you are making these ahead of time you can store them in a plastic bag in the fridge for a few days at this stage.  When you are ready to serve them cut the top off the puff and remove the soft dough from inside (this forms the hollow shell to fill). Make the pudding according to box directions for pudding and fill each puff with the pudding, place top back on the puff. You can then top each with melted chocolate, shifted powder sugar, warmed chocolate frosting or your favorite topping.

So while the end result may look hard to achieve, no one needs to know that it really is not all that hard!

Hope you enjoy!

Wednesday, February 2, 2011

Yummy Beef Ribs

This is what will be cooking in my oven in about another 3 hours. So since I'm working on them I thought I would share with everyone along the way.

2 racks of beef ribs trimmed and cut into individual ribs
Salt, pepper and garlic to season
Your favorite BBQ sauce

Trim the ribs and cut into individual ribs, season with salt, pepper and garlic. Put in a plastic bag and toss with just enough BBQ sauce to lightly coat the ribs and then let them sit in the fridge for at least 4 hours or overnight.
Ribs tossed in BBQ sauce in a plastic bag. Let them sit for at least 4 hours like this.

Here are the ribs in the pan ready to go in the oven.

These ribs cook in the oven, covered at 250 degrees for 3 hours or until tender. Uncover and brush with BBQ sauce and cook uncovered for 30 more minutes. You can switch the oven over to broil the last 10 minutes or so to give the ribs that wonderful caramelized crust if you like.
Here are the ribs all done, barely got a picture taken as the family descended upon them when done!


I serve these ribs with a salad and corn on the cob for a simple meal. To me the ribs are the star of this meal and they take center stage with simple sides and some bread.

Sunday, January 23, 2011

Two meals for the work of one

Okay here is the next recipe. This one is not fixed using beef, elk or deer but chicken instead. The beauty of this recipe is you fix once and have to different meals from it in the end. One meal for the first night is a warm and creamy, cheesy chicken soup and the next meal is green chicken enchiladas. The core to this recipe is a whole chicken boiled until cooked and then shredded to use in the recipe. A nice side benefit to this is the extra chicken broth that you can put in the freezer to use another time.

Cheesy Chicken Soup

One whole chicken cooked and shredded
2 cans cream of chicken soup
2 - 3 roasted and peeled green chilies chopped or 2- 4oz canned green chilies
1/2 cup onion chopped
2 cups chicken broth
1 cup shredded cheese (can use cheddar, colby or your families favorite)

1) Cook the onions in a little oil in a dutch oven until clear. Add shredded chicken, soup, green chilies and enough of the broth to create a creamy consistency but not too runny. If you do add too much broth you can always thicken the soup with cornstarch at the end.
2) Cook the soup until it is hot through out. Add the cheese slowly and stir until melted.
3) Serve with extra cheese on top, sliced green onions and sour cream. You can also top with corn tortilla strips and your favorite Mexican toppings.

This soup makes enough for dinner for 6 or 1 hungry cowboy, two growing girls and a mom, with enough left over to make the second recipe of Creamy Cheesy Chicken Enchiladas.


Here is the second recipe to make with the left over soup later in the week. The soup will thicken while in the fridge during the week to make a great filling for enchiladas.


Creamy Cheesy Chicken Enchiladas

Half of the chicken soup made earlier in the week
1 can green enchilada sauce (you can use red if you prefer)
8 oz of your choice shredded cheese
12 corn tortillas

1) Pre-heat oven to 350 degrees and heat up the tortillas. I like using an the open flame from a burner on the stove top, but you can use the microwave also.
2) Fill each tortilla with enough of the leftover soup and roll-up and place in a 9x13 baking pan. Repeat until all the tortillas are used. If needed to use up all the filling make another pan.
3) Pour the enchilada sauce on top of the rolled-up tortillas and top that with the shredded cheese. Cook covered 15-20 minutes until bubbly and the cheese is melted.
4) Pull from the oven and let sit for a few minutes and then serve with rice, beans and your choice of toppings.


Hope you enjoy. Nothing I like better than cooking once and getting two meals out of it, each one different from the next!

Friday, January 21, 2011

Beef and Mushroom Casserole

Okay here is the next recipe in a series I'm starting on cooking with beef, elk and deer. Just to be clear I have nothing against pork, chicken, lamb, or seafood. It is just this time of year I seem to focus on beef, elk and deer because that is what is fresh to the freezer but have no fear I will post recipes that include other meats as winter melts into spring.

If you look back at the other recipes I have posted here you will see that I'm not one for complex ingredients or lots of time in the kitchen. I much prefer a fix it and forget approach to cooking. There are nights that is probably the only reason why dinner got cooked and the kids were eating peanut butter and jelly sandwiches! This recipe is no different, all in one pot and ready to go at the end of about 30 minutes.


Beef and Mushroom Casserole

1 lb ground beef (this works just as well with ground elk, deer or even turkey)
1/2 cup chopped onion
2 1/2 cups mushrooms sliced
6oz can of tomato paste
1 1/2 cups long grain rice (if you are even more pressed for time you can us minute rice and cut out about 20 minutes)
3 cups water (check the rice package if you are using instant rice for correct amount of water for the rice)
4 oz shredded cheddar cheese ( I like extra sharp for this recipe)

1) Brown the ground meat and the onion. Add the mushrooms and cook for 3 minutes.
2) Stir in the tomato paste until completely mixed with the meat, onion and mushroom mixture. Add the rice and the water. Bring to a boil then lower the heat , cover and let simmer until the rice has absorbed the water and is tender. For long grain rice this will be about 20 minutes or 5 minutes for instant.
3) Top with cheese, let melt and serve.

I fix a dark multi-grain bread with this hearty casserole and steam fresh spinach for a side dish, but your families favorite veggie will work just as well. I will post the recipe for the bread in the next few days.

And as always enjoy with family and friends.

Thursday, January 20, 2011

Some new Recipes

Well the freezer in our house went from sadly empty to full this past weekend as we finished up processing our steer. Every year we keep back one steer and then in the late fall early winter normally we butcher and process him to feed our family the next year. Well this year the weather was not cold enough for long enough and we were later than normal getting the process started so our freezer was empty other than our elk and deer meat waiting to be made into jerky come spring. This ended up being a good thing since I needed to defrost the freezer since it is an old one and did not come with a defrost setting.
In honor of our full freezer of meat I thought I would share some of my favorite beef, elk and deer recipes over the next few blogs. I also thought if any of you are wanting ideas or suggestions for a particular cut of meat or type of meat let me know in the comments section and I will put up a post answering your questions or requests for recipes.
For the first recipe I'm picking one of my favorites for this time of year Elk Stew. Now this can work for deer or beef but if you need a recipe for elk and not sure what to do with the meat this is great one for you to start out with.
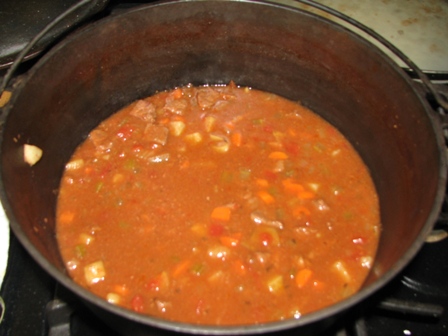
This picture was taken after the pot got raided by everyone. It does make much more than just that little bit


Elk Stew

2-3 lb rump roast of elk cut into bite size pieces
3 carrots sliced
2 medium potatoes cut into pieces
2 stalks of celery chopped
1 small onion chopped
2 cloves of garlic minced
2 small parsnips cut into pieces
1 can chopped tomatoes undrained
2 bay leaves
salt, pepper, and your choice of spices to taste
2 cups beef broth
Enough water to cook the stew and have broth in the end

1) Cut up the meat into bite sized pieces and brown them in a Dutch oven. Add the onion and garlic and cook until clear and soft. Add celery and carrots cook for about 3-5 minutes.
2) Add broth, canned tomatoes, potatoes, parsnips, salt, pepper and your spices. You can add more water if needed at this time or through out the cooking process. Once the water comes to a boil turn the heat down to low and just let this slow cook until the meat is tender and the potatoes and parsnips are soft.
3) Sit back with a cup of coffee and a good book and wait until the stew is done. I have found that it takes around 3 hours to cook on a low slow flame.

Serve with a good piece of bread and good company!

Hope your family enjoys this dinner as much as we do.